To create the plan for your site, you must:
1.Click on , then on the  button or right-click in the list.
2.The creation wizard opens.
a.Select the plan to duplicate.
b.Specify if you want only the or
3.Enter a for this plan.
4.Enter a .
5.Select the concerned by the supervision you are about to create.
6.Click on the  button to load any plans you may have in .gif, .jpg or .png format. This plan will then be used as a visual support to create the supervision plan, but it is not compulsory.
7.Click on the button to save the plan.
 Parameters tab
1.You can modify the data entered when the plan was created.
2.Choose if you want to .
3.The Preview displays the plan previously created in the Drawing tab.
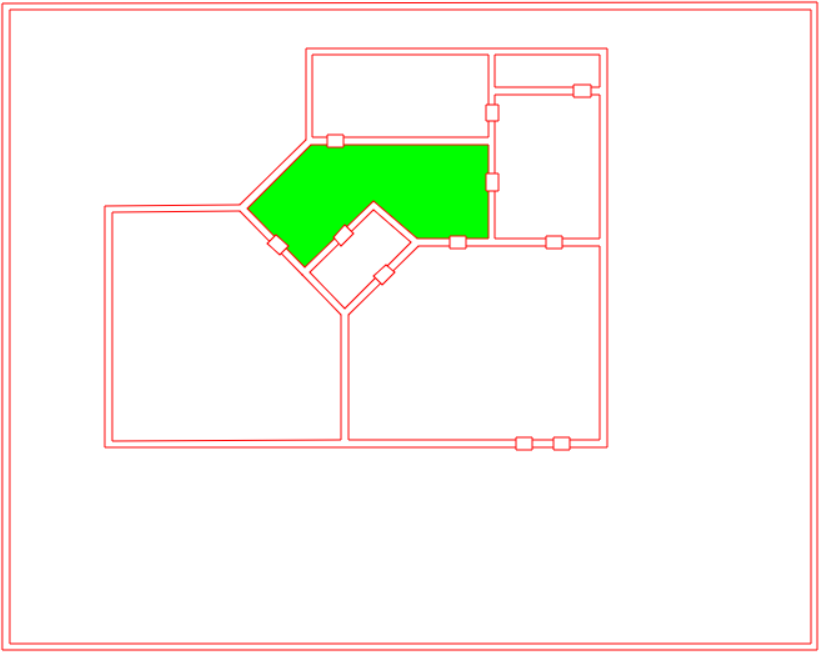
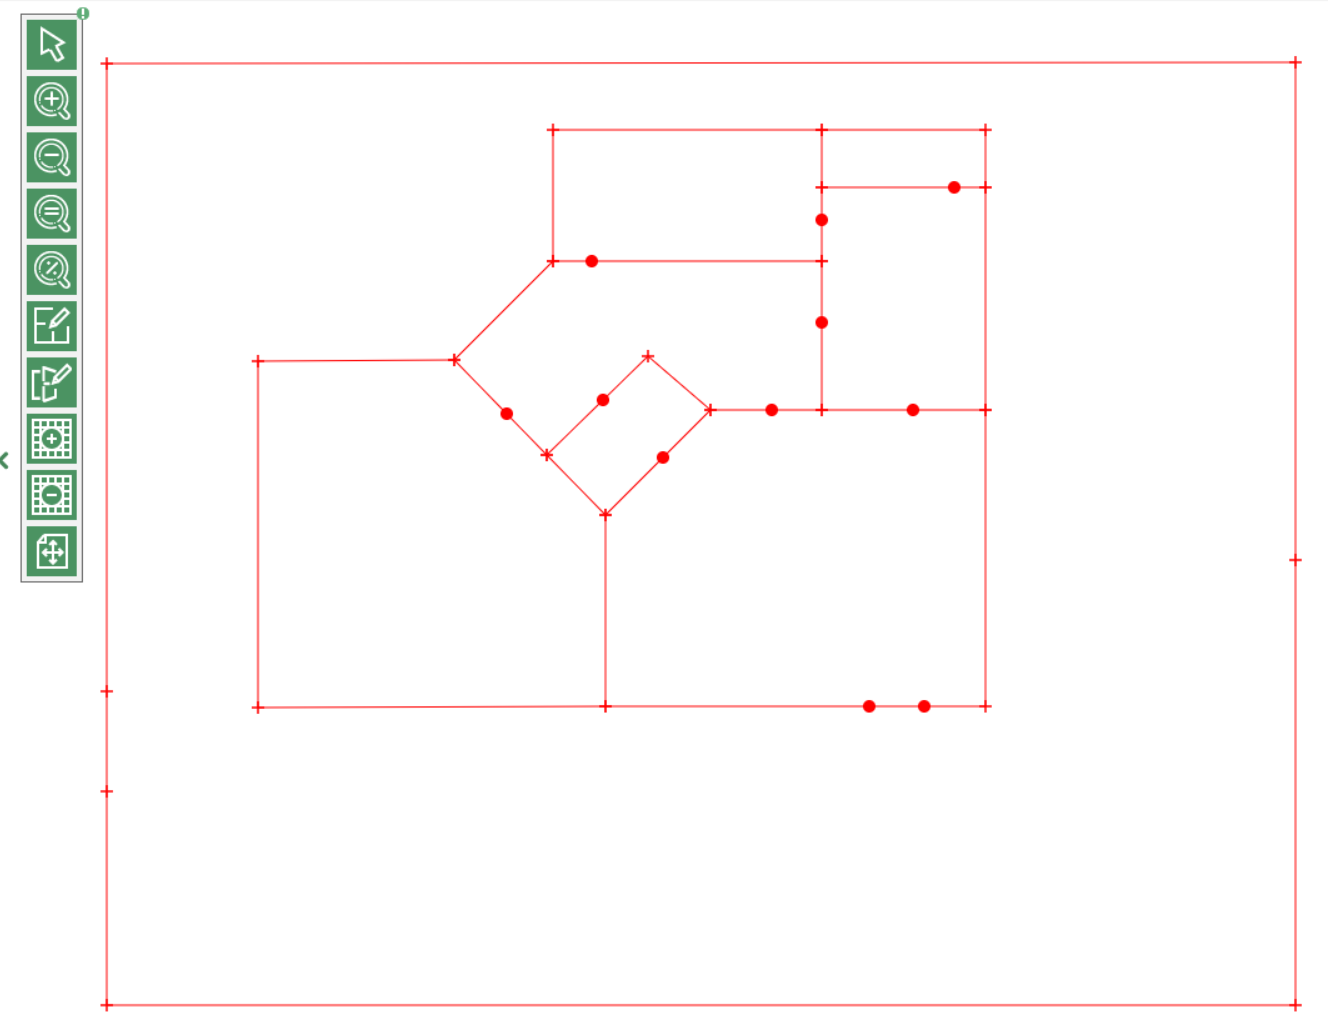
4.Click on each area in turn on the doors and around the edges of the areas to check that they have been correctly marked out and that no accesses have been omitted.
5.You can zoom in on the plan.
|
Picture tab
Draw your supervision plan using the tools in the palette.
Using the toolbar

|
Selects one or more elements (walls or doors) to delete them (Del key on keyboard). The selected elements are displayed in green.
|

|
Zoom in
|

|
Zoom out. These actions can also be carried out with the mouse wheel
|

|
Used to set the plan to scale 1 (dimensions during its creation)
|

|
Adjusts the plan dimensions to the view size
|

|
Draws area edges. A segment is drawn between two clicks one after the other. Double click to leave the line. Hold down the Shift key to draw horizontal, vertical or 45° segments.
|

|
Positions dots (left click) to represent doors. These doors will be then associated to accesses
|

|
Click on this tool to display a line help grid. Click several times to expand the grid.
|

|
Click on this tool to display a line help grid. Click several times to reduce the grid until it disappears.
|

|
Click on this tool to select the line help image loaded in the Parameters tab. You can then move it or change the dimensions by dragging and dropping one of its corners.
|
Shortcuts
|
|
Select one or more elements.
Left-clicking on a selected element deselects it
Clicking and holding a dot of a selected wall allows you to move it.
|
|
|
Delete the selected element.
|
Shortcut to set an access:
|
.
|
|
|
Set an access
|
Shortcuts to draw a wall:
|
|
|
|
Create the dots and outline the wall.
|
|
|
Keeping the Shift key pressed makes it possible to turn the drawing horizontally, vertically or at a 45° angle.
|
|
|
Set an end point for the wall for the line to be drawn, and release.
|
|
|
Cancels the current action and stops drawing.
|

|
You must now configure the plan to associate physical access control elements with the plan which has just been drawn.
|
|
See also:
Configuring a plan
Using graphical supervision
