Kelio Access features can be accessed from the navigation menu or via your portal’s shortcut tiles once they has been set up.
Depending on the profile, the menus allow you to access the setup and access control or the processing of employees’ access results.
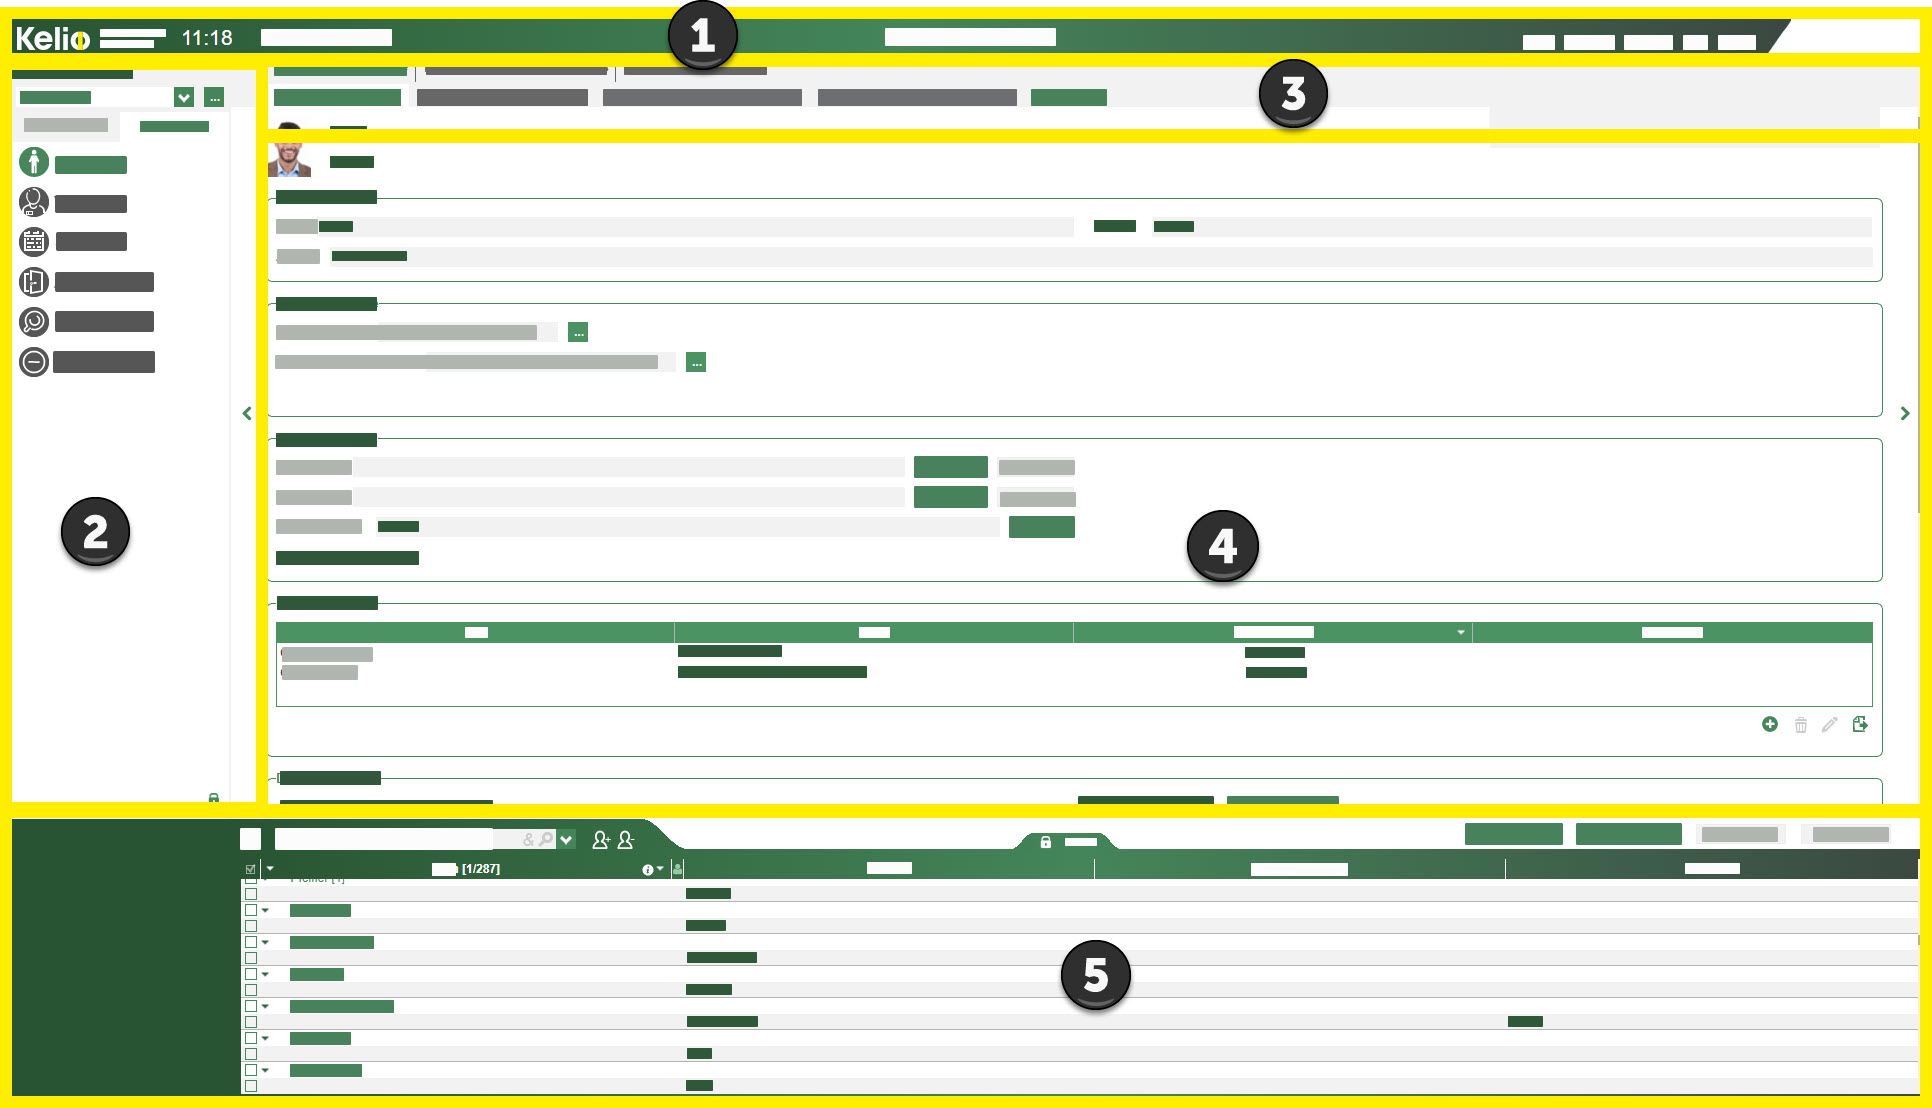
Whatever your profile, screens display 5 main areas.
The areas
A KelioAccess window contains five areas. Click on the numbers for details.
Header
|
|
|
Saves the screen display at a given time with the selected elements and the distribution of the selected areas.
|
|
|
Saves the screen display when is clicked, with the selected elements and the distribution of the selected zones
|
|
|
Restores the initial screen distributions
|
|
|
|
If the system is combined with time and attendance management, when an employee was created in the HR system, they must be "integrated" into KelioAccess if you plan to manage their access. Employee integration can be automatic or manual depending on the setup in Kelio Configuration. In the event of automatic integration, all employees created in the Kelio HR system will appear immediately in the list of employees managed by KelioAccess.
During manual operation, you must integrate the employees from Time and Attendance management.
1.Check the people concerned.
2.Select an employee with a profile close to the one to be integrated in order to use the configuration.
3.Define a registered period.
4.. |
|
Where several users have access to the system, it can prove useful for an administrator to have a visible record of the tasks performed on the system by all users. This monitoring can be carried out using the Modifications logfile. You can therefore know who made a change and on which date.
1.Select the period for which you want to have a report and click on  . .
2.Define the filters you want.
a.Specify the user(s) for whom you want to display a particular action on which concept(s). You can even select a specific employee. Check the corresponding boxes by using the dropdown menus  or the advanced selection windows or the advanced selection windows  . .
b.Confirm.
3..
4.The following elements are available in this list:
•The date and time of the transaction,
•The surname and first name of the user who performed it,
•The type of transaction performed (creation, modification, deletion, etc),
•The type of data (Notion) that has changed,
•Details on the modified concept that will help to find it,
•A box indicating whether the modification details are available.
5.In the event of a change, double-click on the corresponding line to consult the data values before and after modification.
6.A filter makes it easier to look for a certain type of action. |
|
|
Hours:Minutes
|
CTRL+ALT+H
|
07:15
|
Hours,Hundredths
|
CTRL+ALT+C
|
7.25
|
|
|
Blue, Grey, Brown, Turquoise, Green, Purple, etc.
|

|
The employee workspace screens cannot be customised.
|
|
|
|
System dictionary
|
All terms present as standard in the software
|
Customised dictionary
|
All terms that you can modify to adapt to your organisation
|
|
In each module, click on to see a certain number of important pieces of information about your Kelio system, in particular:
•the software version,
•the client file number,
•the version of the computer downloaded to the terminal,
•the total capacities and capacities used by the system,
•The email address, phone numbers and website of the technical support. |
Find Kelio user help, which may be consulted online or downloaded in PDF format. You will also find the new features in the version in PDF format.
|
Log out from the application
|
The different menus
Depending on the modules which are open, in menu 1 you will find the main chapters needed to use the Kelio system.
Menus 2 and 3 appear where applicable when menu 1 opens.
|
|
|
|
|
ADMINISTRATE
|
Employees
|
Individual file
|
Professional data
|
ADMINISTRATE
|
Visitors
|
Visitors
|
List of visits
|
SET UP
|
Access
|
Exceptions
|
X
|
When a user clicks on the reduction element  , the menu reduces to its minimum to only show the icons. Move the mouse over it to show the descriptions again.
It is also possible to display the logo of your site in the top left corner of the screen. This is configured in the Setup.
See also:
Kelio administration
Kelio setup