Advanced functions

Contents
It is possible to perform an action in the Time & Activities > Manage > Advanced Features menu as a group. In this case, the system creates an individual assignment to all of the employees selected. To automatically include all new employees in this group, you must use a dynamic assignment. You will find these two concepts in the Assignment mode column to help you find your way around.
The add/deduct files allow you to credit or debit one of an employee's accounts occasionally or repeatedly. To open the add/deduct files, you must: 1.From the Time & Activities > Manage > Calculation functions > Additions/Deductions menu, select the population or even the person concerned. 2.Via the Filter, choose the existing add/deduct files to be displayed. Let us take a practical example: on 31 December 2022, an employee worked when he/she was not scheduled to in order to fill in for one of his/her colleagues, who was ill. Usually, this employee would not have worked that day. As a result, he/she would not have been granted the special bonus associated with this activity. This special bonus is going to be assigned to him/her thanks to an add/deduct file. 3.To add a file, click on 4.In the right-hand part of the screen, indicate the Date on which the file will be assigned (here 31/12/2015). 5.Select the type of operation you want to carry out (here Adding to an account). 6.Select the appropriate account (here Bonus, Special bonus) and the type of value (Number). Confirm. 7.Indicate the Value to be added (1). 8.Select the Recurrence for this operation in the dropdown menu. When you have entered an end date, click on See the dates to display all the dates on which the add/deduct file will be performed. (As we wish to do it only once, we shall indicate None). 9.Add a Comment if necessary. 10.Specify whether you want this add/deduct operation to appear in the reports. 11.Activate the Exceptional authorisation to the impacted account check box if the employee has no right on this account but if you wish to authorise occasional calculations. 12.Save. Now, the employee has an additional special bonus in his/her account.
The comment being shown in the bottom part of the screen (as the case may be) is designed to provide information to help you understand some additions/deductions made globally. |

The Time & Activities > Manage > Calculation functions > Transfer files tab groups together the transfer file assignments (templates and individual) and the account transfer file requests. Transfer files are assigned to employees as follows: 1.Select the population or person concerned. 2.Via the Filter, choose the existing files to be displayed.
|
Groups together the existing files with their start and end dates, the description and the assignment mode. 1.To add a file, click on 2.In the dropdown list in the right-hand part of the screen, the Type of file to be assigned. There are 3 types of transfer files: •Template files, which are created from the Set up menu, where they are saved to be used for any employee •Account transfer files, which are created from the Set up menu, where they are saved to be used for any employee •The individual files, which are created for one employee and will be used only for him/her. The configuration of an individual transfer file is identical to the configuration of a template transfer file, except that you cannot manage it in a folder since an individual file cannot be saved for other employees. 3.Choose an existing file or create an individual one. Consult the template parameters to see at a glance the configuration of the selected file without having to return to the Setup module. 4.Indicate the Date on which the file will be assigned. 5.Select the Recurrence for this operation in the dropdown menu. Once you have entered an end date, click on See the dates to display all the dates on which the file will be run. 6.Add a Comment if necessary. 7.Activate the Exceptional authorisation to the impacted account check box if the employee has no right on this account but if you wish to authorise occasional calculations. 8.Click on Save to validate the assignment. |
 File run tab
Display the transfer files run by period. Run values can be modified on a case-by-case basis. The file values are accessed via the Processbutton and can be changed individually. A modified file is indicated by a In the event of an error, the Default values button reverts to the original calculation. |
Account transfer requests tab
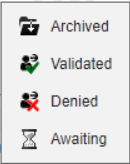
Display the account transfer files requested by the employee, with the detail per file and the symbol corresponding to its status.
|
The Kelio system may manage the absence balances (for example the paid leave) which will enable an account containing an absence allowance to be kept up to date. These balances are created in the Setup module. This balance allowance, if not calculated by Kelio itself (like compensatory leave), requires a regular update (annual update for the leave, for example). The procedure for updating balances is as follows: 1.From the Time & Activities > Manage > Calculation functions > Account initialisations menu, select the population or the person concerned. 2.Via the Filter, choose the existing initialisation files to be displayed. 3.To add a file, click on 4.In the right-hand part of the screen, indicate the Date on which the file will be assigned. 5.Select the appropriate account and the type of value. Confirm. 6.Indicate the Value to be added. Check the Keep the remaining box to add the hours or days remaining on the day before the initialisation date to the initialisation value. 7.Select the Recurrence for this operation in the dropdown menu. When you have entered an end date, click on See the dates to display all the dates on which the initialisation file will be performed. 8.Add a Comment if necessary. 9.Specify whether you want the balance initialisation to appear in the reports. 10.Activate the Exceptional authorisation to the impacted account check box if the employee has no right on this account but if you wish to authorise occasional calculations. 11.Save. It is possible to modify the value of an initialisation already created by simply selecting it in the list and changing its value, except if it is displayed in grey. This screen therefore contains a history of the initialisations that have already been performed on the selected employee. You can change to another employee by selecting him/her in the dropdown list or by clicking on the arrows on each side of the file. |
The rules/extensions allow you to add additional calculations. If you need a specific calculation feature, please contact our sales department for detailed information concerning the conditions of purchase. Once the rule has been installed, all the users with the necessary rights may assign them to employees.
|
To assign a rule/extension to an employee, you must: 1.From the Time & Activities > Manage > Calculation functions > Rules/Extensions menu, select the population or even the person concerned. 2.Click on the Instances assignment tab and the 3.In the window on the right-hand side of the screen, select the rule/extension to be assigned (only rules that have been defined as executable by the consultant will be visible). 4.Enter the application date and any recurrence. 5.Add a comment. 6.If necessary, modify the Rule parameters. 7.Click on Save. In the list, certain assignments appear greyed out. These cannot be modified. In this case, they were created dynamically which means that when a rule is assigned to a group of employees, any new element in the group will inherit the assignment of this calculation rule. |
Process a rule/extension
In the attendance screen, an indicator for rules makes standard rule management easier. This indicator is visible in the Information column of the attendance screen. Click on the icon to open the Rules tab. You may then "check" the open rule using the Check button. |