Personal results

Contents
The Personal results application allows you to consult your own results (presence, absence, balances, totals, etc.). Depending on the rights allocated, you can access all these results or only the ones that interest you the most (these rights are defined in the profile). By clicking on one of these links, you will get directly to the page which corresponds to the results that you want to view.
|
A shortcut can be added to your portal. |

Actions possible from My Workspace
In the My Workspace > Personal results > Attendance menu, you will find your times from the clockings on the terminals, virtual clocking, indication and the attendance declaration.
|

Click on the Individual absence calendar link to open the annual calendar. The absence file is accessed by clicking directly on the abbreviation of the corresponding absence in the calendar or by clicking on the Manage absence files button at the bottom of the screen. This screen lists all the absence files created in Kelio. It is then possible to modify it if the rights have been assigned previously. The table gives details of each absence (start, end, abbreviation and description) and icons indicate whether they begin at the start or middle of the day and whether they finish in the middle or end of the day. You can: •Add an absence by clicking on the Add link (giving access to the absence entry screen identical to that for creating a request), •Modify an absence by clicking directly on the description of the absence requiring modification. •Delete an absence by selecting it then clicking on the Delete link (a warning message will request confirmation of this deletion). Clicking on the |
![]() View the absences for my section
View the absences for my section
The Absences of other employees screen allows you to view a monthly calendar that shows, day by day, the absence requests of all the users in a section or a predefined group of people, whether awaiting validation or not. You can display a selection of people by entering their names in succession in the search box. The lower part of the screen contains the legend.
The top bar of the application allows you to select the viewing period. The month is selected by clicking on the required month. |
![]() View my status in terms of absences
View my status in terms of absences
There are three categories of information on absences: •Total absences, i.e., the number of days taken for each absence type over the required viewing period. •Absence balances, i.e., a number of acquired hours or days that can be used over a period defined by the organisation’s internal agreements. •Estimated absences, i.e., a summary of the two concepts above.
The tables of balances and totals indicate the following for each type of absence: •The Abbreviation and the Description of the balance or the absence corresponding to the total, •The Unit (days or hours), •The Balances and Totals on the current date that take into account all absences taken in the past, •The Balances and Absence totals one year later, on the day before the initialisation or at the date indicated in the Estimated box. These values also take into account the validated absence requests until the selected date, •The value corresponds to the balance or total at the date indicated in the previous column. Acquired is the number of days or hours acquired between the day's date and the estimated calculation date. Taken corresponds to the number of days or hours resulting from validated absence requests, between the day's date and the estimated calculation date.
To modify the estimated calculation date, select Current accounting year or Next accounting year then click on Refresh.
|
![]() See my time management hours accounts
See my time management hours accounts
According to your rights, you can consult different kinds of information: Accounts - An account allows you to count special hours Balances - advance or delay with respect to the contracted schedule Totals - time and attendance by category •contracted total (period during which the employee is supposed to work), •actual total (sum of the hours worked by the employee plus the absences considered as working time, such as training), •paid total (sum of the actual total plus the absences defined as paid, such as paid leave), •normal total (number of working hours that are not overtime and which correspond to the employee's planned working hours in the organisation). It is possible to view the results per day, week, period, cycle or date to date.
|
![]() View your annualised hours results
View your annualised hours results
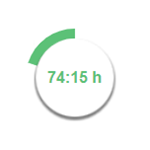
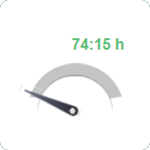
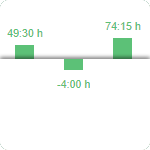
If you are associated with an annualised hours schedule, click on Annualised hours to access the screen presenting your results: The upper part of this screen shows the annualised hours results: •Objective of the period •Contracted time •Difference between objective and contracted time •Completed since the start of the annualisation hours period •Remaining to be done The lower part of the screen displays the detail of the annualised hours results week after week: •Completed •Contracted •Value of the annualised hours balance •Value of the compensation balance These results allow you to make a quick comparison between the planned working time and the completed work.
|
![]() Did I leave too early or arrive at work too late?
Did I leave too early or arrive at work too late?
In the Late arrivals menu, you can view, over a period, the number of late arrivals and early departures. The viewing period (day, week, period or cycle) is selected with the calendar located on the right-hand side of the screen. |
Print your results from the Reports menu. You can choose between two types: •Report of period results (current period to 18 months in the past, current week to week -5, current or previous cycle), •Report of absence files. To generate a report, you must click on the icon |
You can access it from My planning. The planning display settings, such as the viewing period in the future, are defined in the User Rights module. So, the period displayed indicates the schedule display period beyond which display is no longer authorised. However, you can specify the schedule display mode in this page: •The desired view (day, half-day, or hourly) •The period displayed (Week, Month, Date to date) or •The scope of the period displayed. Then click on Display to view the schedule on the screen or on Print to display it in PDF format. The icon
|
|
Access to your employee file and anomalies/alerts is gained directly from a tile in the navigation menu or portal. |